Roof installation is one of the most crucial home construction or renovation aspects. It not only shields your home from weather elements but also enhances your property’s overall aesthetics and value. Whether you’re replacing an old roof, adding an extension, or starting a new building from scratch, understanding the roof installation process is essential. In this guide, we’ll walk you through the steps involved in roof installation, with a special focus on metal roofing systems, including standing seam, and provide insights into pricing and considerations.
Understanding the Basics of Roof Installation
Installing a roof is not just about laying down materials; it’s about creating a solid, protective structure that can withstand harsh weather conditions. The roof serves as your home’s first line of defense, so the installation must be carried out precisely and carefully. It all begins with a clear understanding of the various components of a roof.
The key components include the roof deck, which is the structural foundation that supports the entire roof system; the underlayment, which provides an additional protective layer against moisture; and flashing, which seals roof penetrations to prevent water from seeping in. Of course, the roofing material is the most visible part. It plays a significant role in the roof’s functionality and aesthetic appeal.
The Roof Installation Process
Roof installation is a detailed process, and skipping steps or cutting corners can lead to long-term problems. Let’s take a look at how a roof is typically installed, from preparation to the finishing touches.
1. Preparation and Inspection
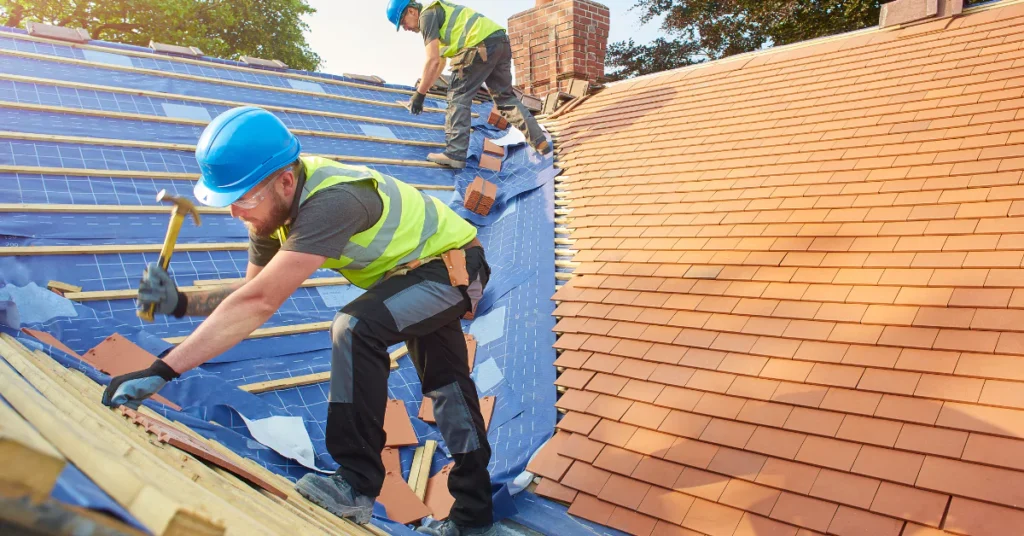
Before beginning the installation, the first step is to remove the old roofing material, whether it’s shingles, tiles, or any other type of roof. This step is necessary to check the condition of the decking. If any part of the deck is damaged, rotting, or weakened, it must be replaced or reinforced.
Once the old materials are removed, the decking should be inspected thoroughly to ensure it is smooth, dry, and clean. This provides a stable foundation for the new roof. If the decking is not in good condition, it could lead to structural issues later on. It is also the Florida Building Code to re-nail the decking with 8D Ring Shank nails to bring it up to the current code and for insurance purposes for better rates.
2. Decking and Underlayment Installation
If the decking is in good shape, the next step is to lay down the underlayment. This protective barrier provides an extra layer of defense against moisture, wind, and other weather conditions. The underlayment can be made of several materials, including felt paper or synthetic materials, each offering a different level of protection and durability.
The underlayment is rolled out across the decking, overlapping seams to ensure there are no gaps for water to seep through. This step is crucial because it helps protect the structure beneath the roof, especially during the installation process or if the roof is temporarily exposed to the elements.
3. Flashing Installation
Flashing is a critical component of roof installation, as it seals areas where the roof meets other surfaces, such as chimneys, vents, or skylights. These areas are particularly vulnerable to water infiltration, so flashing is applied to keep moisture out.
Flashing comes in various materials, including aluminum, copper, and galvanized steel, which are durable and resistant to corrosion. Proper flashing ensures that your roof remains waterproof, especially at points where water can collect, such as roof valleys or around protrusions like chimneys.
4. Installing the Roofing Material
Now comes the main part: installing the roofing material itself. Whether you’re using asphalt shingles roofs, tiles, or metal panels, the process generally starts at the eaves (the bottom edge of the roof) and works upward. This ensures that water flows over the roof without penetrating through seams or joints.
When it comes to metal roof installation, the panels or sheets are pre-cut to fit your roof dimensions. For traditional metal roofing, the panels are attached using fasteners, but for more advanced systems like standing seam metal roofs, the panels interlock, which helps to prevent any water from getting through. Standing seam roofs also have hidden fasteners, giving them a sleek and modern look while reducing the risk of leaks.
The metal panels are installed in overlapping rows, and additional flashing is placed along the edges, valleys, and around roof penetrations to ensure proper sealing. Each row of panels is secured tightly to the deck, and any seams or joints are treated with sealant to prevent leaks.
5. Sealing and Insulation
Once the metal roofing panels are in place, the next step is sealing the seams and joints to provide an extra layer of protection against water. Specialized roofing sealants are applied to ensure no moisture can infiltrate the roof, especially in areas like the valleys or where the panels are flashing.
6. Finishing Touches
Once the main roofing material is installed and sealed, the final touches are added. This includes installing ridge caps, which cover the peak of the roof and help protect the roof from wind and water. Trim around the edges of the roof is also added for a clean, finished look.
Finally, a thorough inspection is carried out to ensure all components are securely in place and the roof is fully functional.
Standing Seam Metal Roof Installation
One of the most popular types of metal roofs is the standing seam metal roof. These roofs are particularly favored for their sleek look and durability. Standing seam roofs use vertically oriented panels that are mechanically fastened to the roof deck. The seams between the panels are raised, which prevents water from seeping into the roof structure.
Standing seam metal roofs are ideal for homeowners who want a low-maintenance roof that can withstand the elements. The seams are usually locked in place with clips, which allow the panels to expand and contract as temperatures change, preventing damage. The hidden fasteners in this system give the roof a clean, modern appearance and reduce the risk of rust and corrosion over time.
Because of their robust construction, standing seam metal roofs are more expensive than traditional roofing options. However, they offer superior performance, especially in areas with extreme weather conditions.
Metal Roof Installation Pricing Considerations
When it comes to metal roof installation, pricing can vary significantly based on various factors. The type of material you choose for your roof, the complexity of the roof design, and your location all play a role in determining the cost.
For example, premium materials like copper or zinc can increase the cost. At the same time, more common options like steel and aluminum tend to be more affordable. The complexity of your roof, such as the number of valleys, penetrations, and the overall shape, can also influence the price. A simple roof with a single slope will generally cost less than a more intricate design with multiple angles and features.
In addition to material costs, labor plays a significant role in the overall price of metal roof installation. The installation of metal roofing requires specialized knowledge and skill, particularly for systems like standing seam roofs. Therefore, labor costs may be higher compared to traditional roofing methods.
FAQs
How long does a roof installation typically take?
The installation time depends on the roof size and complexity. Still, generally, it takes anywhere from one day to a few days.
What factors affect the cost of metal roof installation?
The cost is influenced by the type of metal, roof design complexity, labor, and location. Premium materials and custom features can increase the price.
Can a metal roof be installed over an existing roof?
Yes, metal roofs can be installed over an existing roof if the underlying structure is sound and doesn’t have major damage, but we advise against that.
How durable are metal roofs?
Metal roofs are very durable and can last 40 to 70 years, with resistance to weather, fire, and impact damage.
Are metal roofs energy efficient?
Yes, metal roofs reflect sunlight, reduce heat absorption, and help lower cooling costs, making them energy efficient.
Do metal roofs require a lot of maintenance?
Metal roofs are low maintenance, but there will be some maintenance over the years to ensure the metal roof is in top condition. Regular inspections and gutter cleaning are recommended to maintain their performance.
Conclusion
Roof installation is a complex process that requires careful attention to detail and skilled labor. Metal roofs, particularly standing seam systems, offer exceptional durability, low maintenance, and a sleek aesthetic. While they can be more expensive than traditional roofing materials, their long lifespan and energy efficiency make them a wise investment for many homeowners.
By understanding the roof installation process and the factors that influence the cost, you can make informed decisions about the type of roof that’s right for your home and your budget. Always consult a professional roofing contractor to ensure proper installation and address any specific needs your roof might have. With the right materials and installation techniques, your new roof will provide protection and peace of mind for years to come.